

Your CLAAS forage harvester worked hard for you all season. Now, during the off season, it’s time to give it a little TLC. While formal inspections are necessary, you can handle much of the maintenance yourself. Being proactive now will save you time, money and headaches during next season’s harvest because your machine will run more efficiently. And replacing worn parts keeps crops moving quickly and smoothly through the machine for a faster process and a better-quality product.
Below is a step-by-step maintenance program that you can complete as you wait for next harvest season.
Note: Make sure you follow all safety measures during your inspection. To avoid injury, never clean, oil or perform maintenance on your forage harvester while it is running.
You can’t maintain what you can’t see, so thoroughly wash off all crops and soil. Remember, dirt and debris can attract mice, which chew on wiring and cause electrical issues.
Last season was unusually wet and muddy in many places, so this step may be trickier than usual. You may have to deal with an excess of mud packed between the wheels and shields. The longer the mud sits on the equipment, the harder it can be to remove. You can use a leaf blower to start the cleaning process, but you will probably need to get in those nooks and crannies with your hands.
Once the machine is clean, walk around your machine and take note of any missing or loose parts, the condition of the tires, and any noticeable leaks. It’s a good idea to make a list of action items to work on.
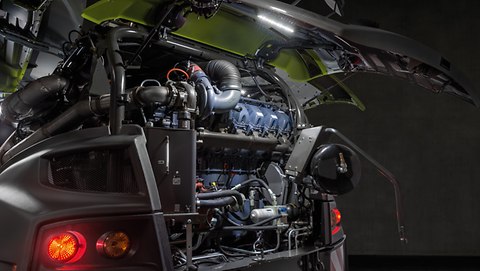
After a good washing, make sure all the bearings in your machine are greased properly. Then, start checking oil levels and fill them to the correct levels. (Too much oil can create heat and cause issues down the road.) Use high quality oil and grease, as it can help your machinery last longer and save you money in the long run.
After the harvest, your machine’s radiator needs to be cleaned with a pressure washer. Also, inspect radiator hoses for cracks or bulges to determine if they need to be replaced. Regardless, hoses should be replaced every two years. After all, you don’t want a rupture in the field during harvest season.
Belts that are too tight or too loose can cause damage to your machine, so check the tension on all of your belts. You can check them visually or with a belt tension gauge. Also, make sure there’s no dirt buildup on the pulleys, as that can cause vibrations in the machine.
First, remove all of the dirt and debris, then do a thorough visual inspection and look for any wear patterns. If you’re changing the wear liners, make sure they’re seated correctly by running your hand over the spot where liners meet. It should be smooth and fit in place.
Before wrapping up your maintenance inspection, think about any issues you ran into during the last season, even if it seemed to “fix itself.” Are there any leaks? Were there inefficiencies? Did you notice vibrations? Make a note of these and take steps to take care of them before next season begins.
Forage harvesters are tough machines built for extreme conditions, but failure to perform proper maintenance can cost you time and money next season. Proactive maintenance can be the difference between downtime and cutting time during harvest.
If you have questions about how to keep your forage harvester running strong, visit your CLAAS dealer.


